I had been wanting to do wainscoting forever, and our dining room was the perfect area to try it on. I was worried about how the boards would meet up with our baseboards, since it was only 1/4 " thick, and I didn't want to replace those and have them not match the rest of the house.
Then I came across this tutorial and knew it was the perfect and easiest way to achieve the look. Since the boards were only 1/4" thick they would line up perfectly with my existing baseboard. Problem solved!
So I made my measurements and took a trip down to HD. I had around 254" of wall length to cover, so here's how the materials broke down for me:
(10) 1/4" x 4" x 3' poplar boards
(8) 1/4 x 3" x 3' poplar boards
254" of chair rail trim
It worked out best for me to space the vertical boards 16.5" across (it was originally 16 but then I found out the boards labeled 4" are actually 3.5" wide! Why do they do this?)
Then I would use the narrower poplar boards and run them horizontally across the wall on top of the vertical boards, then top that off with the trim.
I ended up finding my poplar boards in cubby's below the larger wood pieces. For those of you who always get lost in the HD aisles looking for the right wood, I snapped a pic:
They came in quarter inch and half inch thick pieces, all 3 feet long, in various widths. In the tutorial I followed, she used the same 4" thick (err 3.5") pieces to run across the top, but I was worried it would look too thick with the chair rail so I opted for the 3" (which is also actually 2.5").
FYI, they only had 7 of the narrower poplar boards left so we had to buy one oak in the same size. Ugh. Stay away from oak, it has horrible rough grain that you can see when you paint over it and it's really hard to cover without turning yellow. Stick with poplar!
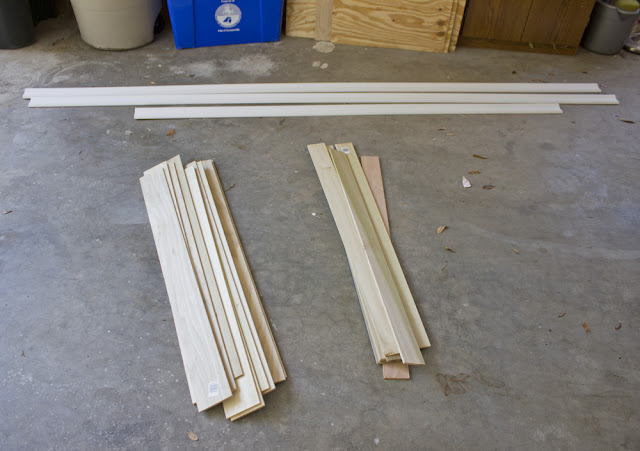
Anyway, here are all my pieces at home, ready to cut:
I wanted the height to be 3' (plus the existing baseboard), so I carefully measured the cutting point for each vertical board by mocking it up against a yardstick:
After making all the straight cuts and miters (with only one small miter disaster that we later fixed with caulk) the boards were ready to go up!
Here I'm leveling the board for the nail gun:
And board #1 is up!
Here's two more...
I'll fast forward through all the rest—here is the end of phase one:
In phase two, we attached the narrower poplar boards across the top:
Then in phase three, we added the trim:
All that was left to do was caulk and spackle and paint! Which ended up taking 80% of our time.
Our plan and our measurements were just about perfect... but we forgot that this house was not built perfect. The walls are not completely straight and level, so we ended up with some gaps here and there where the boards didn't quite meet:
Luckily we were able to fill it and sand over it and you can't really tell unless you're looking for it.
On to the results!
Here is the before before, as in when we bought the house....
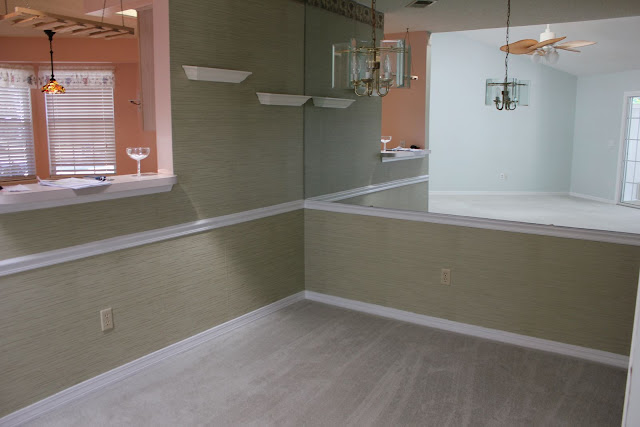
Here is the before we started, as in yesterday morning:
And...... after!
Ahhh... worth every second of sanding and painting!
Here is the project cost breakdown:
10 vertical boards: $24.70
8 horizontal boards: $18.45
Chair railing: $29.91
1 gal Behr paint + primer (we were out): $33.98 (minus $5 mail in rebate)
Total = $115 ($110 after rebate)
Timewise, it took a couple hours to get the wood all cut and mounted, another few hours to caulk and sand at least, which carried over to the next day where it took a good half day to paint and put the final touches on. In hours I'd say we spent a good ten hours on the project (again, most of it spackling and sanding out the problem areas).
All in all, I'm so happy it's finally done, and I want to do our bedroom next! It will take some time to convince Brad to do this all over again though :)
Be back in a few days with another kitchen update!
Just linked up with the DIY Showoff!


0 comments:
Post a Comment