Flower Arranging 101
the art to making it easy
I love arranging flowers. I think it is something that anyone can do - because the style that I like the simpler the better. I don't think flowers should be contrived or stark. I think they should be bountiful and sweet - just as they would (should) grow, with natural bending lines and movement.
Floral arranging looks like it should be easy because the best arrangements are those that look natural. However, it is not always so easy to make flowers look 'natural'... there are a couple of tricks to learn.
I've mentioned before how my Aunt Joanie was a cake decorator and how she would let us 'help' her decorate cakes. Her sister, my Aunt Phyllis is a florist. She used to also let us 'help' her when she had large jobs and weddings. We would get to tie bows (it was the late 80's and early 90's... there were lots of bows) and prep roses by pulling the leaves off of the stems. Phyllis is one of those people that has an eye and a hand for artistry. She has a knack for creating a natural looking arrangement - tweaking the placement of a rose here, maybe a branch of greenery there to add interest and natural movement.
When I was first starting out as an event designer, I went back to Phyllis for a little floral training - as an adult. She taught me some of the tricks to shaping a bouquet, keeping it fresh, and how to look at each flower's shape to determine where it should be placed for the most appealing look.
I put together (or I attempted to...) a little step-by-step for the arrangements I created for Emma's Baptism :
1) Start by getting all of my flowers prepped - taking off all of the foliage off of the stems - or most.
2) Gather your vessels to determine shape and size. Fill them with clean, cool water. Here, we're using coffee cups for the mini arrangements that will go down each table and a larger white urn that will be used on the Alter, then brought down for the buffet centerpiece.
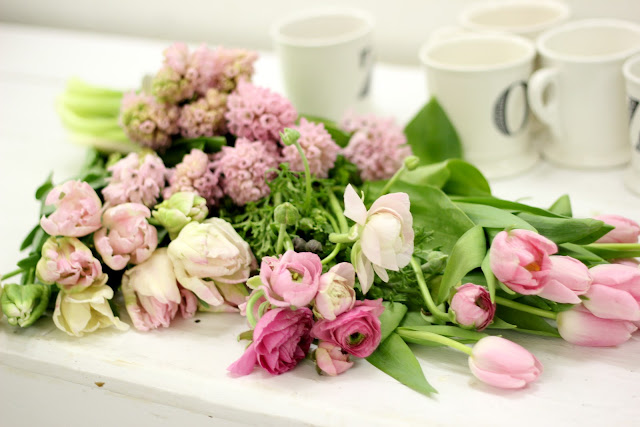
3) Pile all of your flowers up - blooms out - to see how they look together. Edit from here - then you know exactly what you're working with.
Pictured Left to Right :
-Pink Parrot Tulips
-Pink Hyacinth
-Pink Ranunculous
-Pink Tulips
In the Vase (not in the photo here)
-Blush Pink Hydrangea
-Cream Garden Roses
-White Lilac (on the table)
4) Start with the branches - they will help to determine the shape, as well as create stability for each bloom as you place it in the vase.
Then... I got carried away. I got so into it that I forgot to take more step-by-step photos! So...
The finished product! Here is how I got there :
5) Hydrangeas - they will create most of the fullness.
6) Garden Roses - place them in the holes between the hydrangeas
7) Lilac - place them in groups of three. I like these at the base of the arrangement because they bend nicely. Be sure to stick a couple in at the top just off center because they will add nice height.
8) Tulips - place these in groups of two and three. I also like these bending down around the base.
9) Ranunculous - fill in with whimsy. These should look a little random as they peek up through the flowers.
For the smaller arrangements that went on the tables. I like the use of coffee cups vs. traditional vases because it lends a little casual touch - I didn't want anyone to think this was a stuffy affair... just a family brunch! I've been known to use cereal bowls, pitchers, drinking glasses... whatever I can find that I like the shape of.
I made little hand arrangements and divided up the flowers until they were full. There is not much to these! I finished with a couple of magnolia leaves for contrast.
Emma was a great helper (because she slept almost the entire time!). She even put on her overalls for the big job. Don't you love that knit hat?
The finished product...

Click here to see more details about the brunch!


0 comments:
Post a Comment