When I started brainstorming our Christmas decor this year, I had so many ideas and dreams to fill every room in our home with beautifully crafted unique handmade masterpieces (ha).
Well, then we had family in town for Thanksgiving and work became crazy so I had to abandon my elaborate plans and come up with a handful of quick DIY's to decorate and photograph our home in time for two Christmas blog tours.
It was quite the task, but after a few DIY marathon days and nights I pulled it off and now I can share the details!

And if I can do these in the constraints I was working with, I promise anyone can!
Each day this week I'll be sharing a new project—starting with one of my favorite's today: "Branchlers".

I wish I could take credit for this idea but it was something I spotted a while ago on Pinterest:

I was obsessed with the plaid and had to copy it. Then I saw these and decided to put both ideas together:
 |
| Source |
I've made a real antler plaque before so I figured this had to be just as easy.
First step: buy a plaque at Joann's. These are super inexpensive, usually a few bucks each. I also picked up a small swatch of plaid fabric.

I brought out a staple gun just in case but it wasn't needed—the hot glue gun worked fine.
Starting around the edges, I carefully secured my fabric to the front of the plaque using hot glue.

I worked my way all around the edges...

Then I wrapped it onto the back, secured with more hot glue and trimmed the excess.

Done! At this point you'll want to attach a picture hanger on the back before you start on the branches.
Next it was time to find some branches. I found two from the yard that had a similar shape and size. Here's one:

Then I used cutters to trim it down and simplify it a bit.

After repeating with the second branch, it was time to attach them. There's several ways to do this, but since my branches were fairly light I thought finish nails would be sufficient.
First I sliced down the bottom using my saw just so that it would have a nice, flat surface area and mount the way I wanted it to...
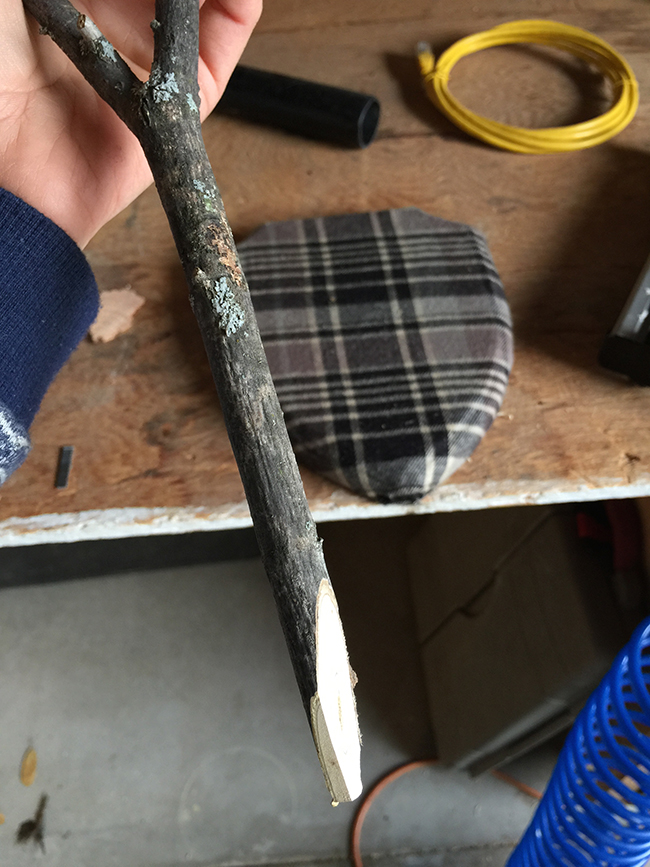

Then I shot a couple nails into it—worked like a charm!

I chose neutral coloring for the fabric so that I could use it throughout the year instead of only during the holidays.

It's one of my favorite things in the room, and you have to love that it didn't take more than a couple hours and cost less than $5 to make.
That brings us to the free holiday printables! I wanted to bring some pops of red into our living room and kitchen area so I thought the perfect way was through art.
This "Making Spirits Bright" print is perfect for a bar setting but of course it can be used anywhere:

And then there's the matching Joy print which I love:


It's hard to see from the photos but they have a subtle woven/knit background detail:


They're both 8x10" for easy framing. I really enjoyed creating them and hope they can bring some holiday cheer to your home!
The set is available as a free high resolution download from my Facebook page—you just need to make sure you're signed up for the shop newsletter and then you'll be prompted to start the download.
Tomorrow I'll be back with Day 2 of this Holiday DIY week, so make sure to check in for more last minute handmade inspiration!

0 comments:
Post a Comment