
If you missed yesterday's post, make sure to check out my branchlers tutorial and free printable downloads.
Today is all about the Christmas tree ornaments...

Like I've mentioned before, I was basically starting entirely from scratch this year so I needed to fill this tree up with decor that wouldn't be a budget breaker.
For my base I started off with 20 yards of 6" jute burlap ribbon purchased here for under $22 shipped. I'll definitely reuse it again so I think it was a pretty good deal!
I also found this pom fringe trim for $1 yard on Ebay and bought 20 yards to drape around the tree. I love the touch of whimsy it adds.
Then it was on to the ornaments. The first thing I knew I wanted from the beginning was big bows.

This was super easy—I bought a few rolls of this ribbon on sale from Joann's, divided them into equal pieces and tied them into bows. They bring the perfect amount of red and they're my favorite part of the tree!
Another thing I knew I had to have was pinecones. I have a ton of these lying around so I chose the smallest/lightweight of the bunch, cut some ribbon, made some bows, and glued everything together:

Pinecones and bows go together like pb&j, don't you think?
Next it was time to bring a personal element in. Right before Thanksgiving I got the idea to have our guests write out things they were thankful for onto these hang tags (purchased at Joanns):

I thought it would be neat if they had an aged look, so I dipped them in coffee, hot water and a bit of cinnamon to stain the paper:
 |
| Don't make the water too hot or the paper will fall apart! |
After preheating the oven to 200°, I removed the tags from the mixture so they weren't soaking wet...

Then spread them onto a cookie sheet and placed them into the oven:
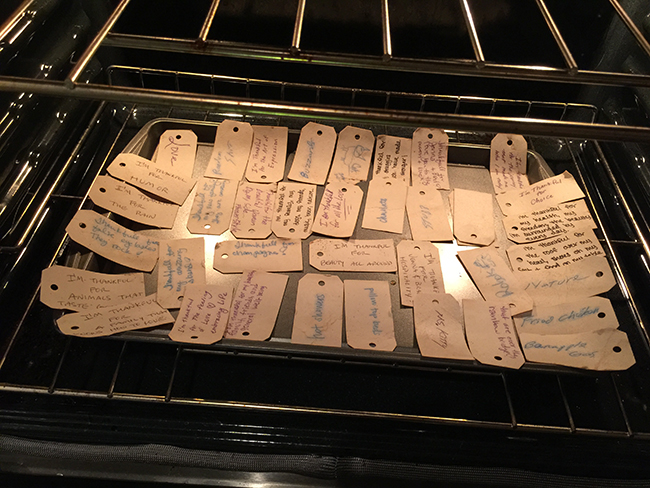
I babysat them for a while, checking often and removed them once they were dry (maybe 20-30 minutes?)

We used a variety of different pens and some of the ink bled in the drying process—I think the best results were had with the fine tip permanent markers.
To hang I simply used some wire ornament hangers from the dollar store.

For the final touches, I enlisted some inexpensive store bought ornaments to help fill in the gaps. During a trip to Ikea last month I picked up this set of 56 ornaments for just $10—what a steal!

However, I was going with a more neutral/rustic theme this year so decided not to use silver. Easy fix—I simply strung all the ornaments between a couple trees outside and spray painted them white.

I also found a handful of white pom pom ornaments I had made a couple years ago so I threw those up as well.
The Ikea ornament set came with a tree topper, but I decided to make it a little more cozy and warm with yarn I found on sale at Joann's (can you tell Joann's is the only craft store within 50 miles of this town?)

It was an easy 10 minute project... just glue and wrap...

A good solution for my time constraints, I think!

And there you have it, my simple cozy traditional rustic DIY Christmas tree :)

See you back here tomorrow for more last minute holiday DIY's!

0 comments:
Post a Comment